
Packing electronics for a move feels overwhelming and expensive mistakes are far too common. Here is something that surprises most people: using the original box can reduce the risk of damage more effectively than any generic moving box or bubble wrap setup. Still, even those custom boxes are not enough on their own unless you use a few key strategies that most people ignore.
| Key Point | Explanation |
|---|---|
| 1. Use original packaging when possible | Original boxes provide the best protection for your electronics, maintaining their integrity during transport. |
| 2. Back up all digital data first | Create backups of important files to prevent loss during movement, even with careful packing. |
| 3. Carefully label all cables and devices | Labeling cables and components will streamline the unpacking process and ensure correct reassembly. |
| 4. Organize and document disassembly | Use clear labeling and documentation to remember connections, making reassembly easier and preventing lost parts. |
| 5. Inspect electronics immediately upon arrival | Check for damage and functionality as soon as devices are unpacked to address issues promptly. |
Preparing to pack your electronics begins with gathering the right materials and tools. This crucial first step ensures your valuable devices remain protected throughout the moving process. Proper preparation can make the difference between a smooth move and potential damage to your expensive electronics.
Start by collecting specialized packing supplies designed specifically for electronic equipment. Original packaging is always the best option if you’ve kept it, as these custom-designed boxes provide the most precise protection. For devices without original packaging, you’ll need a comprehensive set of materials that offer robust protection against potential impacts and environmental challenges during transportation.
Your essential packing toolkit should include:
When selecting boxes, opt for new, rigid containers that haven’t been weakened by previous use. Avoid recycled boxes from grocery stores or random shipping containers, as these might compromise the protection of your electronics. Learn more about proper packing techniques to ensure your devices arrive safely at their destination.
Carefully measure each electronic device before selecting a box to guarantee a snug fit. Loose items can shift during transportation, increasing the risk of damage. Wrap each item individually in anti-static bubble wrap, paying special attention to fragile components like screens, ports, and external controls. The goal is to create a protective cushion that prevents movement and absorbs potential shocks during transit.
Preparing your packing materials is more than just gathering supplies it’s about creating a strategic defense for your valuable electronics. Take your time, be methodical, and remember that the extra effort you invest in this initial step can save you from costly repairs or replacements later.
Below is a summary of essential packing materials and their specific purposes to help you protect your electronics effectively during a move.
| Material/Tool | Purpose | Notes |
|---|---|---|
| Original packaging | Most precise protection | Use whenever possible for best fit and security |
| Sturdy cardboard boxes | Contain and protect devices | Choose new, rigid boxes for strength |
| Anti-static bubble wrap | Cushion electronics, prevent static damage | Especially important for sensitive components |
| Packing paper/foam sheets | Fill gaps, add extra shock absorption | Wrap individually and pad inside boxes |
| Packing tape | Secure boxes and wrap layers | Use high-quality tape to seal all seams |
| Permanent marker | Label boxes and components | Ensures easy identification during unpacking |
| Zip-lock bags | Hold small accessories and parts | Label to match with corresponding device |
| Cable ties/rubber bands | Keep cables organized and coiled | Prevent tangling and possible wire damage |
| Silica gel packets | Absorb moisture inside boxes | Helps protect against humidity and condensation |
After gathering your packing materials, the next critical step is preparing your electronics for safe transportation. This process involves more than simply wrapping devices it requires careful planning and strategic protection to ensure your valuable technology survives the moving journey intact.
Back up all digital data before beginning the packing process. This means creating complete system backups, transferring important files to cloud storage, or copying critical information to external hard drives. No matter how carefully you pack, accidents can happen, and protecting your digital memories and work is paramount.
Begin by disconnecting all cables and accessories from your electronic devices. Take time to label each cable with its corresponding device using masking tape or adhesive labels. This small step will save you significant frustration during unpacking and reassembly. Explore professional packing strategies to streamline your electronics moving process.
Your disconnection and preparation checklist should include:
For computers and laptops, additional precautions are necessary. Remove any external hard drives, media cards, or DVDs from drives. If you’re moving a desktop computer, consider removing the graphics card and other sensitive internal components if you’re comfortable doing so. For those less technically inclined, transporting the entire computer in its original packaging or a well-padded box is recommended.
Take special care with screens on monitors, televisions, and laptops. Apply a soft cloth or foam sheet as an initial protective layer before wrapping with anti-static bubble wrap. Avoid using regular plastic wrap, which can trap moisture and potentially damage electronic surfaces.
For smaller devices like tablets, smartphones, and gaming consoles, consider using their original packaging if available. If not, select a box that allows minimal movement, filling empty spaces with additional packing paper or foam to prevent shifting during transit. Remember that tight and secure is the goal preventing any potential internal component damage from movement.
Preparing your electronics might seem time-consuming, but this meticulous approach significantly reduces the risk of damage during your move. Each careful step you take now can save you from costly repairs or replacements later.
Disassembling and organizing your electronic components is a critical phase of the packing process that requires patience, methodical approach, and strategic planning. This step transforms complex electronic setups into manageable, safely transportable parts that can be reassembled with minimal stress upon arrival at your new location.
Systematic disassembly is key to protecting your electronics. Start with larger systems like home entertainment centers, computer workstations, and multi-component audio setups. Take time to document your current configuration before disconnecting anything. Smartphone cameras become invaluable tools here take multiple photographs from different angles to create a visual reference for future reassembly.
Organize your components using a comprehensive tracking system. Your organization toolkit should include:
For each electronic system, create a detailed documentation process. As you disconnect components, place corresponding screws, mounting brackets, and small accessories into clearly labeled zip-lock bags. Learn advanced electronics packing techniques to ensure maximum protection during transit.
When disassembling computer systems, pay special attention to internal components. If you’re comfortable and experienced, consider removing graphics cards, RAM modules, and hard drives. Place these sensitive parts in anti-static bags to prevent electrical discharge damage. For those less technically confident, leaving internal components in place and padding the entire system might be the safer approach.
Cord and cable management requires special consideration.
Avoid simply bundling cables together, which can cause tangling and potential damage. Instead, loosely coil each cable individually, securing it with a cable tie or rubber band. Place each coiled cable in a separate labeled bag, noting which device it belongs to and its specific function.
For home entertainment systems with multiple interconnected components like sound bars, speakers, and streaming devices, create a color-coded labeling system. Use colored tape or stickers to match cables with their corresponding devices, making reassembly straightforward and intuitive.
The goal of this step is creating a logical, organized approach to dismantling your electronic ecosystem. By taking time to document, label, and carefully separate components, you minimize the risk of lost parts and simplify the eventual reassembly process. Patience during disassembly translates directly into a smoother setup in your new space.
Packing electronics requires precision, care, and a strategic approach to ensure your valuable devices remain protected during transit. This step transforms the careful preparation and disassembly from previous stages into a comprehensive protection strategy that minimizes the risk of damage.
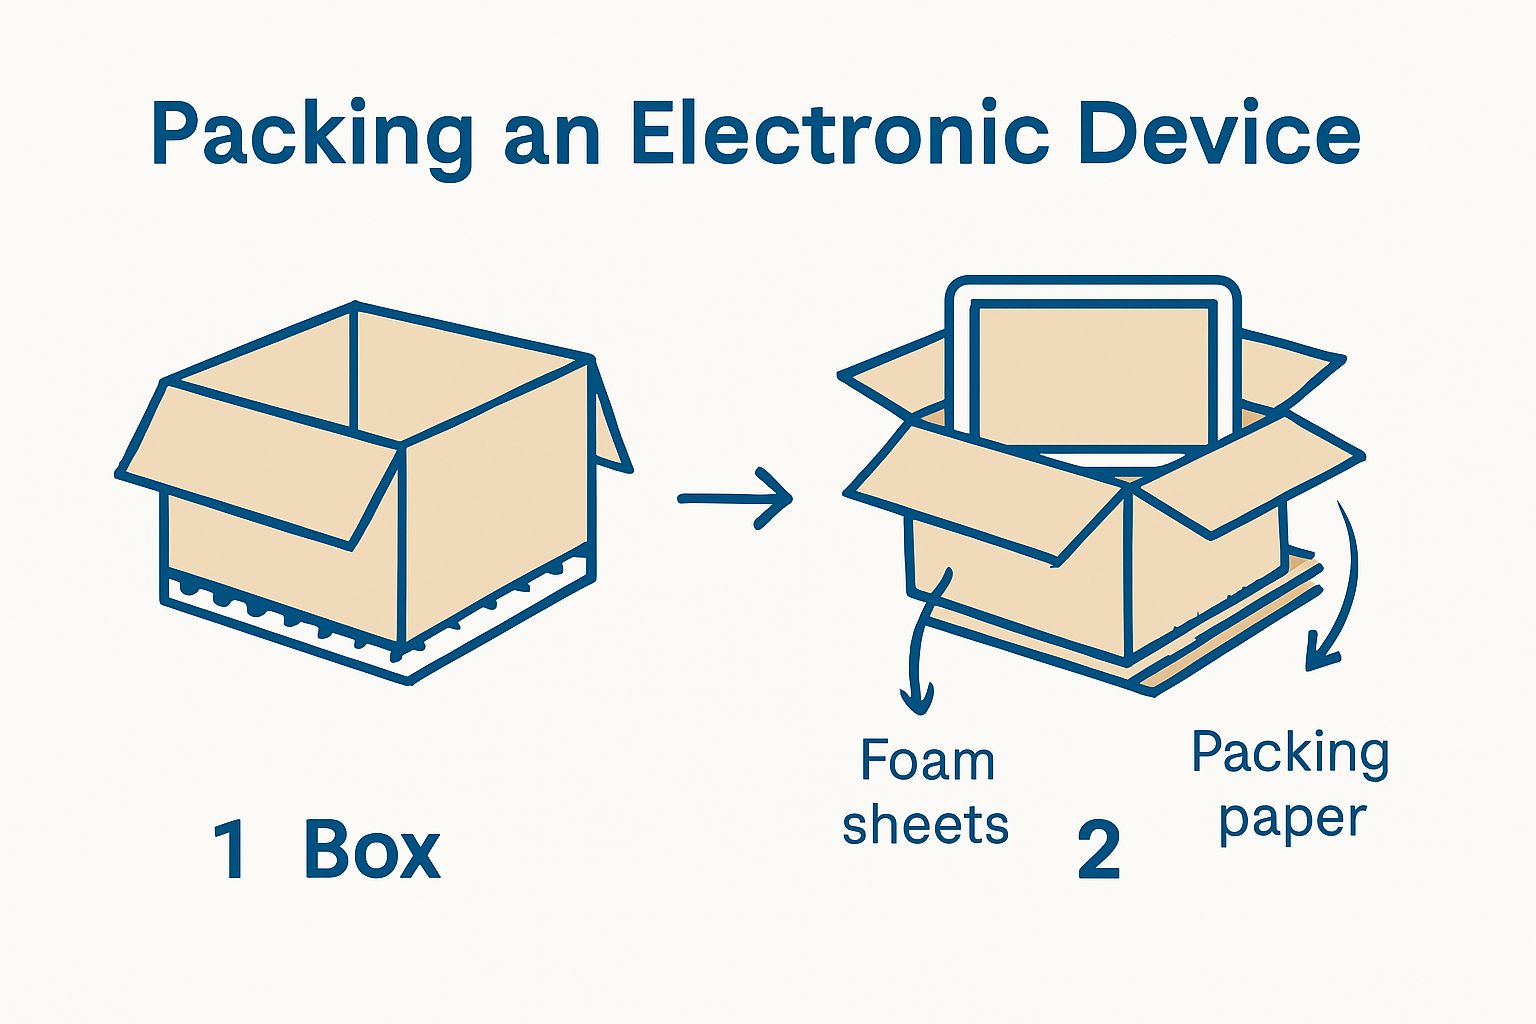
The foundation of secure packing is selecting the right box and padding materials. Ideally, you want a box that provides minimal extra space around the electronic device, preventing internal movement during transportation. Learn more about choosing optimal moving boxes to maximize protection for your electronics.
Begin by creating a protective base layer in each box using anti-static bubble wrap or foam sheets. This initial cushioning serves as a shock-absorbing foundation for your electronic devices. Wrap each component individually, paying special attention to corners, screens, and other fragile areas. Use multiple layers of anti-static bubble wrap, ensuring complete coverage without leaving any exposed surfaces.
Your electronic packing essentials include:
When placing devices into boxes, create strategic padding zones. Fill any remaining空 spaces with crumpled packing paper or additional foam sheets to prevent shifting during movement. Avoid using standard packing peanuts, as these can generate static electricity that potentially damages sensitive electronic components.
According to government preparedness guidelines, original packaging remains the gold standard for electronics transportation. If you’ve retained the original boxes, use these as your primary packing solution. For devices without original packaging, select boxes that closely match the device’s dimensions, allowing minimal internal movement.
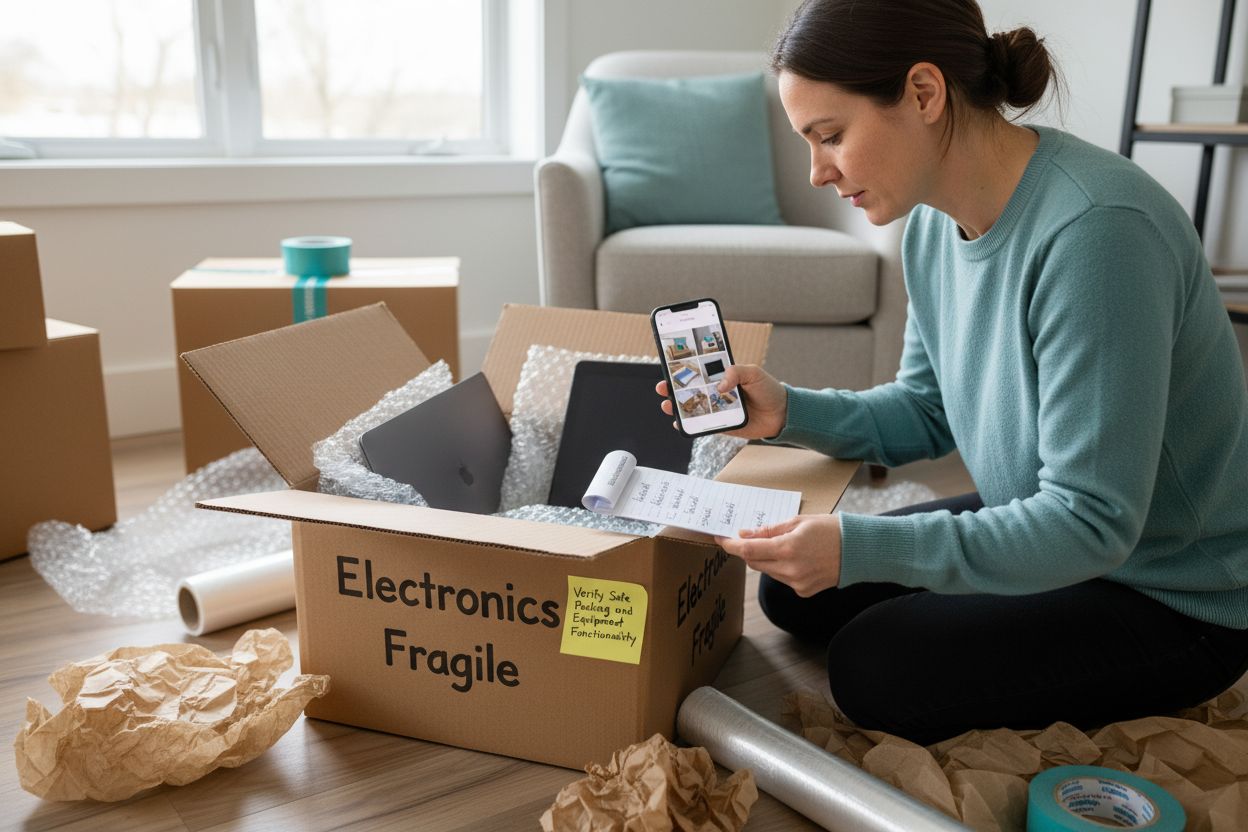
Carefully seal each box using high-quality packing tape, reinforcing all seams and edges. Create clear, visible labeling on each box indicating its contents and marking boxes as fragile. Consider using international shipping symbols that indicate the need for gentle handling.
As a final verification step, gently shake each packed box. If you hear or feel any internal movement, add additional padding until the contents are completely secure. This methodical approach transforms complex electronic systems into safely transportable packages, minimizing the risk of damage during your move.
Labeling is far more than a simple organizational task it is a critical strategy that protects your electronics and streamlines the entire moving process. Proper labeling creates a comprehensive tracking system that reduces stress and potential confusion during unpacking and reassembly.
Develop a comprehensive labeling system that provides critical information at a glance. Your labels should communicate not just contents, but handling requirements and destination details. Explore professional moving organization techniques to enhance your labeling strategy.
Begin by selecting high-quality, durable labels or permanent markers that will remain legible throughout the moving process. Choose waterproof markers and large, clear writing to ensure visibility. Each box containing electronics should receive multiple identifying markers to guarantee information survival even if one label becomes damaged or obscured.
Your essential labeling information should include:
Create a color-coded system to enhance organization. Use different colored labels or stickers for various electronic categories like computer equipment, entertainment systems, or home office technology. This visual coding allows movers and helpers to quickly understand box contents and handle them appropriately.
Photograph each labeled box before sealing, creating a digital inventory that serves as a backup reference. This digital documentation can prove invaluable if physical labels become compromised during transit. Store these images in a cloud storage service or backup drive for easy access.
Consider creating a separate master inventory list that cross-references box numbers with detailed contents. This document becomes an essential tracking tool, allowing you to quickly verify that all electronics have been packed and transported correctly. Include serial numbers, approximate value, and any special handling notes for high-value or particularly sensitive equipment.
A strategic labeling approach transforms a potentially chaotic moving experience into a structured, manageable process. By investing time in thorough, clear labeling, you significantly reduce the risk of lost or mishandled electronics. Your future self will appreciate the meticulous effort when seamlessly reassembling your technology in a new space.
The final stage of your electronics moving process focuses on comprehensive verification and careful unpacking. This crucial step ensures that your meticulously packed devices arrive intact and fully functional, transforming careful preparation into successful transportation.
Unpacking requires the same level of patience and precision as packing. Begin by creating a dedicated workspace with clean, flat surfaces where you can methodically unpack and inspect each electronic device. Learn more about professional moving and unpacking techniques to streamline your process.
Carefully open each box, maintaining the protective packaging until you are ready to conduct a thorough inspection. Remove devices slowly, checking for any visible external damage. Pay special attention to corners, screens, and ports where potential impacts might have occurred during transit.
Your comprehensive equipment verification checklist includes:
According to government preparedness guidelines, immediate testing of electronics after moving is crucial. Power on each device systematically, allowing sufficient time for startup and initial diagnostics. Do not rush this process modern electronics often require several minutes to complete initialization and self-checks.
If possible, compare the current state of your devices against the documentation and photographs you created during the disassembly process. Verify that all cables, accessories, and small components have been successfully transported and remain in good condition.
Should you discover any damage, document it immediately with clear photographs and detailed notes. Contact your moving insurance provider or the moving company to initiate any necessary claims processes. Prompt documentation is critical for potential reimbursement or repair considerations.
The checklist below summarizes key inspection and verification steps to follow after unpacking your electronics, ensuring everything is in good condition and ready for use.
| Verification Step | What to Do | Why It Matters |
|---|---|---|
| Visual inspection for physical damage | Examine devices for cracks, dents, or scratches | Detects visible transport damage |
| Test all power connections | Plug in devices and verify they power on | Confirms devices are operational |
| Verify internal component placement | Check that internal parts haven’t shifted | Prevents operational issues |
| Check screen/display functionality | Turn on screens and look for defects | Ensures screens are undamaged |
| Test peripheral device connections | Attach accessories (mouse, keyboard, cables) | Confirms all ports and devices work |
| Review saved configurations/settings | Make sure original settings are intact | Restores your setup and preferences |
Take time to gradually reassemble complex electronic systems, referencing your earlier documentation. Reconnect components methodically, ensuring each connection is secure and correctly oriented.
 This deliberate approach minimizes the risk of accidental damage during reassembly and helps you quickly identify any potential issues arising from the move.
Did you know most damage to electronics during a move happens because of improper packing or missed preparation steps? Even when you follow expert guides and wrap your devices with care, the thought of delicate screens, fragile components, and sensitive data being at risk can be stressful. The article you just read explained how vital it is to use the right materials, label for easy reassembly, and take time with every piece. But what if you could eliminate the worry and leave your valued electronics in the hands of professionals?

Trust your move to the experts at US Pro Logistics. Our team uses proven methods for preparing and securing electronics, and we can handle everything from fragile TVs to complete office setups. We offer full-service packing and unpacking to make sure nothing is left to chance. Whether you are moving across California or to a new state, our reliable relocation services protect your technology from start to finish. Ready to safeguard your valuable electronics and enjoy a move with zero stress? Visit https://usprologistics.org now to request your free quote and experience the peace of mind you deserve.
Start by collecting sturdy cardboard boxes, anti-static bubble wrap, packing tape, and zip-lock bags for small accessories. Ensure you also have foam sheets or packing paper to create cushioning, and label everything clearly.
Before packing, back up all data, disconnect all cables, and remove batteries from portable devices. Label each cable for easy reconnection later and photograph any complex setups for reference during unpacking.
Systematically disassemble larger systems, documenting your setup with photographs, and place components in labeled zip-lock bags to keep them organized. This method minimizes lost parts and simplifies the reassembly process later.
Wrap each device individually with anti-static bubble wrap and create a protective base layer in the box. Fill empty spaces with packing paper or foam to prevent shifting during transportation, using boxes that allow minimal movement around the electronics.
Use durable labels or permanent markers to indicate the contents, handling instructions, and destination for each box. Consider adding color-coded labels to categorize different types of electronics for easy identification during unpacking.
Conduct a thorough inspection for any visible damage and test each device’s functionality by powering them on. Take note of any issues immediately and document them with photographs to address potential claims if needed.
USDOT 3664256 This number is required for any company that operates commercial vehicles in interstate commerce (across state lines). It helps identify and track the safety performance and compliance of transportation companies.
MC 1268070 This number is specifically for companies involved in the transportation of goods or passengers for hire across state lines. It’s necessary for carriers operating in the moving industry and ensures they are authorized to operate as interstate carriers.